Perhaps the most underappreciated tool is the computer based fight simulator. Expensive, full motion simulators are used for training for commercial air liners. PC based systems (without motion) are available for general aviation at a reasonable price. Xplane and Prepar3D (Lockheed Martin) have excellent software. And if you invest in really good rudder pedals along with basic joystick and sliding throttle, the flight experience is quite realistic.
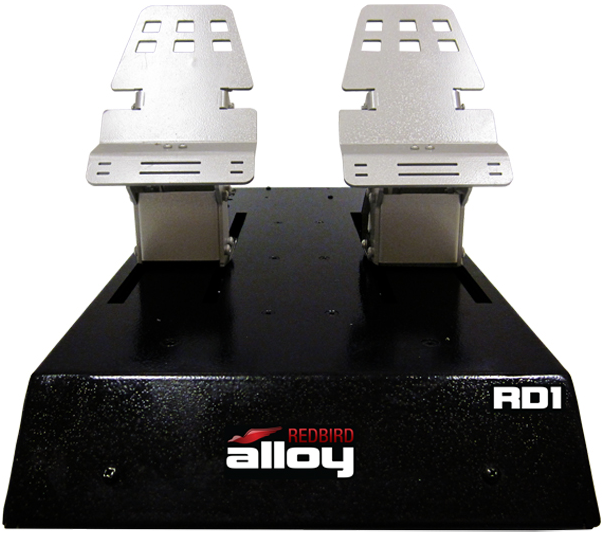
I set up a simple system at my desk. Biggest expense is a powerful GPU and Redbird rudder pedals. I used the J3 Cub, running in Prepar3D software. (see pics) Don't skimp on the rudder pedals--it is really important that they be "realistic" if you are learning to fly a tail wheel plane.
 |
| My modified "Cub J3" stick/rudder simulator |
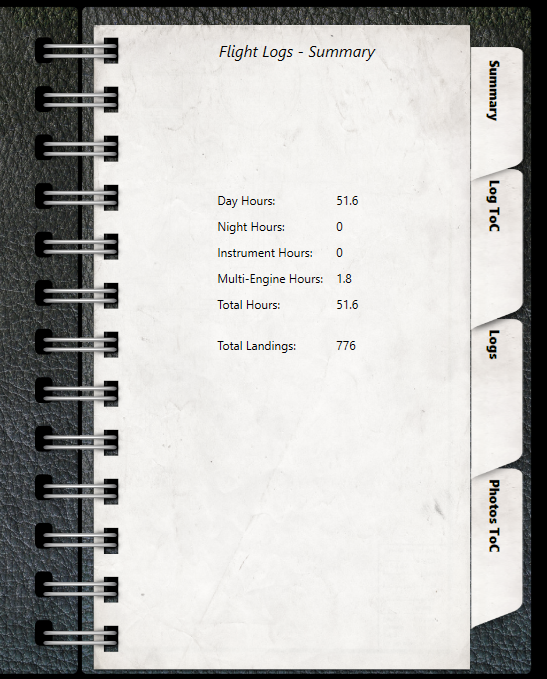
You will note that during the time I accumulated 11.6 hours of real life "dual" with CFI's, making 69 landings, I also accumulated 50+ hours and 776 landings on my simulator. (See below) Over the next week and a half, I added another 10 hours and 100 landings.
Some real advantages is you can learn various airports (almost all of them are in the database) and you can change crosswinds.
In addition, practicing stalls, spins, recovery from unusual attitudes, as well as emergency landings is not scary.
The FAA will not acknowledge time in a simulator for your training, and many CFI's will roll their eyes, but it is still valuable.
I set up the views so I could read the gauges and view the plane's attitude when making videos. I use a video capture software (Mirillis Action!) to make short youtube videos for review.
Nearly every tail wheel pilot I have spoken with had read Stick and Rudder: An Explanation of the Art of Flying by Wolfgang Langewiesche. The concept of "Angle of Attack" dominates in his book, and he goes into long discussions about flying fundamentals. It is a thinking man's approach to flying. I read it carefully and repeatedly.
Still, after all this instruction, I am still less than 100% comfortable with my landings. So I keep seeking more info. Maybe another instruction program. Maybe more videos. Maybe another book.
Enter, Jim Alsip at Dylan Aviation in Florida. Jim's Website I had watched several of Jim's "Hangar Talk" videos on Youtube. So, I gave him a call. He answered on the second ring and graciously spent several minutes with me. In addition to suggesting that he would be happy to have me visit and train with him, he also suggested that I read his book/s.
I purchased his Flying the Tailwheel Airplane book on Amazon and loaded it on my Kindle. Wow! Eureka! After reading his book, the "secret" that I had been missing in my understanding regarding landings was discovered!
From Jim's book (pg 51):

And, he teaches that the "sight picture" will identify that you are in the proper flight attitude for each "phase". Typically, the "Glide" calls for a slight nose down attitude. The "Roundout" is where the plane is placed in a neutral flight attitude, about the same sight picture as when taking off with the tail up. These two phases are almost the same whether you are doing a power off wheel landing or a three point--the difference is how you slow down the rate of the decent in the "Flare"---with power in the wheel landing (followed by stick forward once the wheels touch) or by back pressure on the stick raising the nose for three point. Read the whole book, but this is the part that helped me the most.
Timing of the "Roundout" is perhaps the most difficult thing to learn or judge, but to me, the consequence of being early is simply that you use more runway as you "float" further. (Doing it late can be bad---that will often cause the dreaded tail wheel "bounce".) So, be sure you are landing at airports with a bit of extra runway when you are learning and move to shorter runways when you have more practice.
The two pics below show the "Sight Picture" for a wheel landing. Note the distance from the cowl to horizon is the same for level flight, just after "Roundout" and just after "Touchdown" with immediate forward stick pressure. They are the same. The plane descends slowly with the same level flight attitude and same forward speed.


The other advantage of the sight picture is that it forces you to look to the horizon.
Some find the wheel landing to be easier because it is sometimes easier to control the sink rate with throttle alone when the attitude remains constant--but timing of forward stick upon touchdown is critical or you will bounce. The three point landing requires a coordinated movement of the stick to control sink and speed along with an increasing nose high attitude, timing the touchdown before or at stall. I personally find that the process of controlling the sink rate and speed to be easy, with the timing of getting the nose high right to be a bit difficult---but if your speed and descent rate are low enough, a "tail low" landing a near minimum airspeed is still a pretty stable landing in calm cross winds--the tail will fall very quickly and you won't bounce--it may just produce a small and harmless "hop". A dangerous bounce during a three point landing attempt is mostly caused by too much speed and/or too fast a descent--inertia forces the tail down and there is enough speed to take off.
The middle of the three pics above for a three point landing shows a sight picture that happens to be the same as this plane provides when flying a "minimum controllable airspeed" with 1500 rpm "level flight" just above stall speed. So at less than 1500 rpm, this attitude produces a deceleration and a slow descent. So mastering three point attitude is helped if you have practiced slow flight and how the plane feels just before stall. Just as you approach this critical speed, you will "feel" the plane sinking, even with increasing back stick--at that point, you can bring the tail down faster with full stick back on most planes and create a near perfect three point.
The Prepar3D sim has been VERY helpful to me. I entered a thread on SuperCub.org and was flamed for questioning several responding members that doubted sims were helpful and even suggested they might be harmful. So ask most high time pilots---and they will tell you that the using a sim is not helpful. This is completely contrary to my experience.
To me, practicing slow flight BEFORE you do a lot of landings is important. Obviously, I am in the minority in this view as most of the CFI's I have encountered tend to go right to doing take off and landings.
My quest for knowledge continued.
I found a website titled Advanced Tailwheel Training. http://advancedtailwheeltraining.com/
I was impressed with the organization of information, it's clarity and analytical approach. A wealth of information on all aspects of flying a tailwheel airplane. Ron Dillard's illustration of the difference between a "Power On" and a "Power Off" wheel landing was particularly illuminating as was his discussion about recovery from a "Nose High Unusual Attitude". His clarification of stall speed and banking angle was also useful.
The FAA Wings Program that offers an alternative to the more traditional Flight Review "Ground School" provides a huge library of learning resources. I decided to fully participate in the program--I think it is excellent. One teaching that I found particularly useful is one that reinforced the importance of setting "Personal Minimums" and sticking to them---and changing them perhaps as your skills improve.
UPDATE AFTER 6 MONTHS------Note: Keep in mind that I am not a CFI and I am simply sharing information that I have found valuable in my learning process.
I repeat...The Prepar3D sim has been VERY helpful to me. You can see that over a six month period, I managed 3000 landings in 147 hours of flying.

Not even figuring plane rental--just fuel and maintenance for 147 hours of flight and 3000 landings would certainly be $7000 in out of pocket costs. So, the sim has saved me money.
But most of all, it allows regular practice. I have averaged more than 20 practice landings, 5 days a week, for 26 weeks. I landed at 12 different airports in my flying area---and am now familiar with approach to each. I have practiced my dead reckoning cross country navigation--building confidence. And, since it is a sim, I can practice without fear. Practicing lots of crosswind landings, deadstick emergency landings, low altitude back country type landings--wheel landings, tail low wheel landings, and three point landings. I have practiced short field takeoff and landing techniques. Much more practice than I could have ever experienced in real life. And, I get to practice nearly every day---no matter what the weather is outside.
Sure, the J3 in Prepar3D handles differently than my Sport Cub---less power and less sensitive controls--and no vortex generators. But, the basics are there. I see these sim's as very valuable tools to improve and maintain proficiency.
In addition, I added Virtual Reality with the Oculus Rift. Increased pixel density so I could read instruments. Pretty amazing---very close to real flight. Only thing missing is the G forces. (Flyinside add-on did not work well for me, but the "standard" Virtual Reality view that Prepar3d v3 provides is quite good--just not as many bells and whistles as what the Flyinside add-on would provide--if it worked on my machine.
No comments:
Post a Comment